For many people, drawing noses is one of the most challenging aspects of portraiture. Their soft shadows and shapes require a good eye for structure and light. However, with the right tips and techniques, mastering the art of drawing noses can become much easier.
Drawing Noses: Basic Shapes of the Nose
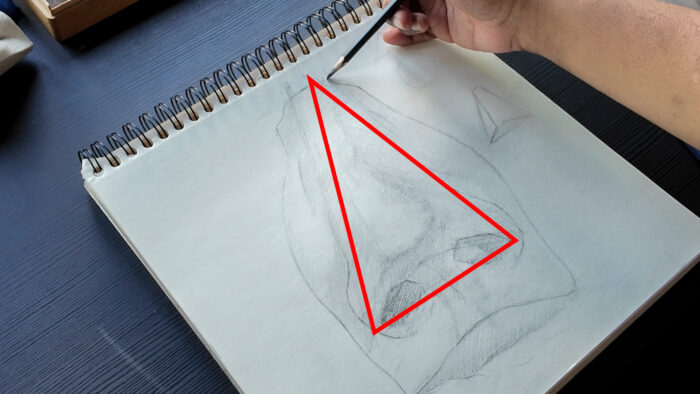
There are two simple shapes that can be found repeatedly throughout the nose, these being the triangle and circle.
The triangle as a base for drawing noses
One of those said triangles starts at the top of the nose bridge and comes down to the outer corners of the nostrils. This forms the basic shape of the nose.
The next triangle runs from the nostrils up to the tip of the nose. Depending on where the light source is, this area is often in the shadow.
Then there are two triangles coming down from each side of the nose, connecting the edges of the nostrils to the top of the nose bridge.
Furthermore, there is a small, upside-down triangle between the nostrils, which – again, depending on where the light is coming from – is typically shaded in.

The circle as a guide shape for drawing noses
The tip of the nose is shaped like a sphere, which helps us understand its tonal values and depth.
Lastly, the nose bridge also forms a round, oval shape, which, depending on the individual anatomy, may be more pronounced or structured differently.
Understanding these basic shapes helps us visualize the planes and anatomy of the nose more clearly.

Tip for Drawing Noses:
When working in a large format, always do a small structural sketch beforehand, to get a better idea of what the proportions should be like. Only after that, focus on adding details.
The Nostrils
It’s important to keep the distances between the inner and outer lines of the nostrils in mind, to then be able to accurately depict their shape. Also, it’s crucial to pay attention to the constantly changing structure and curves of the nostrils.
There’s a simple trick to check your work: If you fill the nostrils in with a flat tone, mistakes become more visible and you can easily adjust your sketch if needed.

The Nose Bridge
While it’s most common to use a straight center line, consider experimenting with a plastic line that stretches across the entire nose. This line will help you imagine how the nose curves in space and how light and shadow interact with its structure.
You’re interested in learning more about how to draw a nose? Then watch our video with step-by-step instructions from one of our Academy Directors:
Final Thoughts:
When working on portraits, try not to think of the nose as a whole, but rather as a plastic object in space.
Oftentimes it’s overwhelming to “just draw a nose”, because your own prejudices on what a nose should look like restrict you. If you observe things just how they are – shapes and shadows – drawing them automatically becomes much less complicated, then it might seem to begin with.
If you want to learn more about how to draw, feel free to read our other blog articles on this topic: